
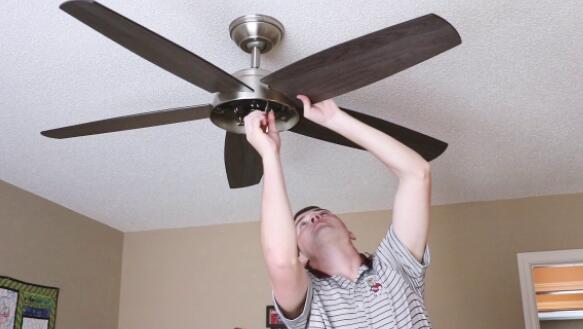
The process of installing a hunter low profile ceiling fan may seem complicated at first, but when you follow the exact guide ceiling fan installation is moderately straightforward. It worthy since its high efficiency mingles amply air in the entire room, with low clearance accessories.
Besides, Hunter’s low profile ceiling fans enable someone to enjoy ceiling fans in housings via eight ft ceilings. However, you need to avoid any possible shock, reduce personal injury, and fire the risk by following the right instructions.
Therefore, consider the following complied guide on how you can successfully install a hunter low profile ceiling fan.
How to Install Hunter Low Profile Ceiling Fan?
Step 1 Pre-installation Instructions
(a) Choose the installation site and ensure that regular users don’t come in contact with revolving fan blades.
(b) Installation hardware embraced for the usual plaster ceiling or standard drywall. Besides, someone will require a 4″ *1/2″ or 4″ *1-1/2″ octagon wire nuts and outlet box, bought from any electrical supply house or hardware store.
(c) However, the fan blades should be mounted about 7’ above the floor. For supreme efficiency, they must not contain any obstruction (posts, walls, etc.) within 14″ of specific blade tips.
Step 2 Inspection of Fan
(a) Unload the fan prudently to avoid any impairment of the components
(b) Check thoroughly any shipping destruction to the fan blades and motor assembly. If you had installed more than one fan, have the balanced and matched fan blades in five groups as transported. However, if you may notice any damage of fan blades during shipments, it right to return both edges inset for replacement.
(c) Ensure that contents include a bag of parts.
Step 3 Installation of Rough-In wiring and Outlet Box
Make sure the electricity is off at the fuse panel when repairing and inspecting the installation site. Also, your wiring should meet national and local electrical codes. Avoid mounting directly to any unsupported electrical outlet box or ceiling; the mounting process should support a 35-pound fan with fittings.
(a) Protect metallic opening box 4”*1/2 or 4″*1-1/2 depth to 2*4 cross brace among double ceiling joists. Besides, the outlet box should get recessed to the ceiling via 1/16 minimum. Also, protect the outlet box into cross brace by drilling two pilot holes and not larger than the minor diameter of wood washers and screws. Utilize the innermost hovels to protect the container, position the package to ensure the outer ditches aligned with the two*four brace.
(b) Take the electrical hawser to the outlet box and attach it using an approved connector. Ensure the wiring meets local and national electrical codes. The wire leads must extend for about six” beyond outlet box for comfort in making connections.
Step 4 Installation of the ceiling plate
(a) Fix the four (4) neoprene bushings at the top of the ceiling plate by inserting the bushing’s slight side to the four ditches’ ceiling plate.
(b) Strand lead wires and the opening at the top of the ceiling plate and through the inaugural in the hook bracket side. Utilizing the double center slots, attach your ceiling plate into the tow*four brace supporting the outlet box. Utilize (two) #10 woodscrews 3″ extensive for mounting via the outer ditches. Besides, drill two pilot hovels 9/64 diameter in the tow*four brace for mounting bolts.
Step 5 Hanging of motor
(a) Lift your motor and insert the plastic hook to the opening in the anterior of the hook bracket. Ensures that no wires get trapped inside the hanger bracket and plastic hook.
(b) Rotate the plastic hanger and motor assembly until the inferior half of plastic hook fits the square opening in the metal bracket’s bottommost. Check the assemblage via attempting to revolve the plastic hanger and motor accumulation. When correctly fixed, the upper part of the plastic hook should sit flat inside the holder, and the assemblage will not revolve.
Step 6 Final wiring
(a) Link the electrical source leads into leads from the motor, utilizing approved connectors.
1. The black electrical source leads into the black motor lead, then the black one with white strip motor lead.
2. Attach the white electrical source lead into the white motor lead.
3. Join the ground wire into green leads.
(b) Once you settle the wire connections, wires must spread apart with the green and white wires on any side of the outlet container, and then do the same to the black/white and black wires on the other side of the box. However, the splices must be turned upward and also pushed carefully up to the outlet box.
Step 7 Complete Fan Assemblies
(a) Utilizing two 8-32 via approximately 5/8 extensive screws from sack parts and thread the plastic hook, locking screws to the hook bracket’s back.
(b) Put the fan housing and the motor assembly and secure the housing into the ceiling plate utilizing the four screws.
Step 8 Balancing and attaching the blades.
(a) Fit wood blades into blade brackets utilizing (3) screws for every edge.
(c) Take out the screws from the motor hub and insert them in a hovel in the blade bracket. Utilize a screwdriver to hold specifically, line up blade hovels using mounting hovels via readjusting blade, and turning the screw until screw buddies with a threaded dump in the hub.
(d) The blade matching kit comes with a fan; thus, someone might utilize the gear to exact the balance following equipment supplied instructions.
Step 9 Attach upper switch Housing.
(a) Moderately fit two # six-32*3/8 accommodation assembly screws to the switch housing mount plate.
(b) Feed your upper plug linkage via the center opening of upper switch accommodation
(c) Line up the keyhole aperture in the upper switch accommodation with housing assembly screws fitted in sub-step A
(d) Besides, turn the upper button housing anticlockwise until the accommodation assembly screws are strong position in the keyhole’s thin end.
Step 10 Attach the lower Switch Accommodation.
(a) Fix the upper outlet connector from the motor into the lower socket connector to the lower switch accommodation assembly.
(b) Put the lower switch accommodation above the upper one. Line up side screw hovels in lower and upper switch housings. Fit the lower switch accommodation to the upper housing using three#6-32*3/8 accommodation assembly screws.
Step 11 Running of FAN
(a) Turn on the electrical service at the main panel
(b) The motor is electrically reversible, so when the fan determines the direction of airflow at first running. And when you want to change the path, you need to switch off the fan and lets it stop. Slither backing switch to the opposite location and your fan back on.
Conclusion
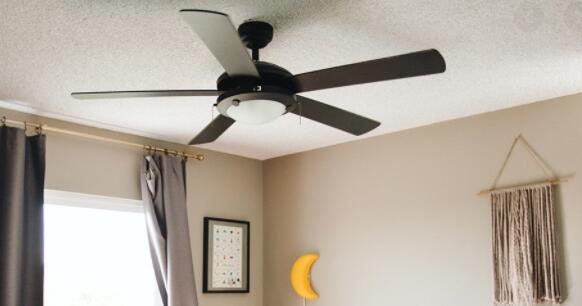
As a result, with a few materials and tools, someone can learn how to install hunter low profile ceiling fans in just a few easy steps. Besides, the hunter ceiling fan is unique to your office or home that will offer ease and performance for many decades. Therefore, the above guide gives someone complete and helpful instructions for operating and installing your fan.