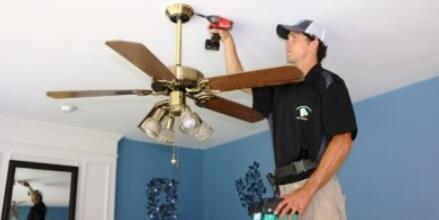
Installing your ceiling fan can be a daunting task because of its requirement and specifications. Many people end up with the wrong installation procedure by depending on online reviews and guides from sources with no idea about the whole process. Having your fan installed wrongly can result in power electrocutions and short-circuiting a dangerous situation that can lead to losses.
We understand the process better because we have done our research online and consulted most of the small ceiling fans on the right installation process to ensure you have a clear and perfect installation.
From buying to hanging your fan, the guide works to ensure you achieve the common goal of having a home fan to cool and improve air circulations. With that being said, here are some basics and fundamentals that should properly hang your ceiling fan.
How to Hang a Ceiling Fan?
Ceiling fan installations vary from one design to another, and this is because of different designer’s specifications and fan performance. It is wise to consult or read more on the fan’s installation procedure before making any move towards fitting or hiring someone to do the fitting for you. But for the common and general installation process of all typical ceiling fans, here are basic steps to help you achieve a good and ideal installation process.
Ceiling Fan Overview
The first step towards fitting your fan or hanging it on your ceiling is understanding the whole fan overview. This involves the general requirement required to install and some fittings required for your fan. Each fan has its own overview, and common installation tools do not use online screws and guidelines in your fine unless the fan is installed in your online search is the same as your brand. Overview study involves the assessment of the ceiling joist, electric box, power cables, canopy, fan motor, and down rod pipe for holding your fan.
Step one; Power and other Fixtures
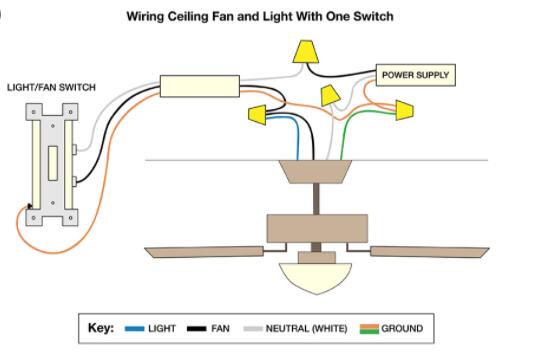
Installation is done on your ceiling, and for safety, it is wise to ensure that power is disconnected and all the power cords fitted or insulated before making any move. Place your joist frame in place using nails or given screws in the fan, ensure you remove all old wiring connections for new fan installation.
Step two; Cut the New Hole.
Try to remove the old electrical box connection to pave the way for new installation in the box. If your joist is in place, try to nail to improve their strength. This can vary from one fan to another; if your brand has a suspended bar or from the joist, it is recommended you use a pry bar to hold the joist. Hold the pancake box against the ceiling, positioned on the joist, and try to trace it using a pen or pencil. Use a drywall saw to cut along or across the line in this stage.
Step three; Attach the Electrical Box.
At this stage, install all electric cables coming from the power supply through the knockout hole in the fan pancake box. Set the box and its fitting in the hole you made in step two above and press it tight against the joist. Fix the box the fan joist and a full inch with ten hex screws you can use a screwdriver. Wrap all the power cables with insulators and allow them to hang down for your fan’s power supply.
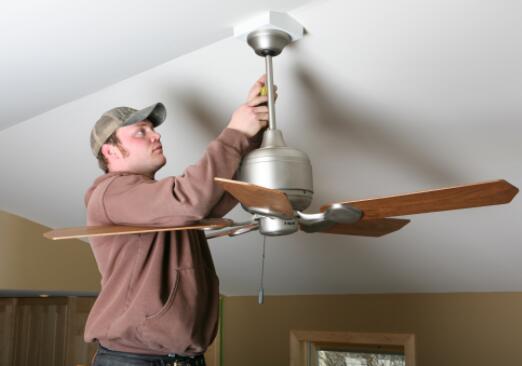
Step Four; Attachments on the Ceiling Ensign
Use glue or urethane-based adhesives to hold the ceiling medallion in place, but this varies from one fan to another be sure to have the right adhesives. Pass the cables through the ensign and position the medallion on the press and pancake box. Ensure they hold in place. If they don’t, you can use nails to hold the joist well.
Step Five; Mounting of Ceiling Plate
This step involves mounting the fan frame in the ceiling and giving the power cable a direct way to power the motor. Here fittings depend entirely on the user’s specifications on the right screws and nails to be used. Before making any move in this stage, consider using fans nails given in the box or find some for your fan.
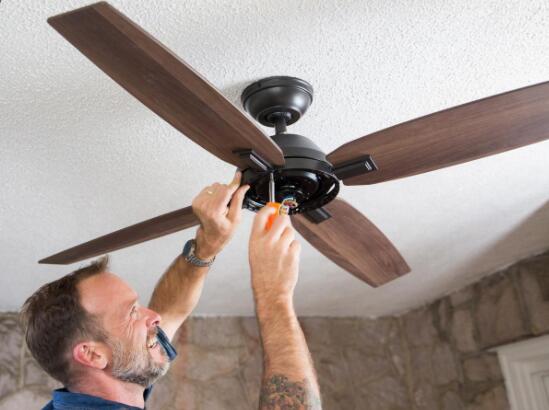
Step Six; Assemble the Fan and Wire Connection
Using the designer specification on the right fitting process ensure you fit all the parts well. Take your time trying to find more about your fan specification and each component fittings. Power cables all the natural and positive fitted in their supply then hook them in the canopy.
Step Seven; Attach the lights and the Blades.
Attach each blade to the blade iron; a blade iron is a bracket that holds the fan and the blade. Plug all the light-fittings into the power cable under the fan’s motor then install lightbulbs and shades. Screw the holder for your remote control on the wall switch. Tools required; Wire stripper, Nailset, Hammer, Driver/drill, Drywall saw, Screwdriver, Caulk gun.
How to Hang a Ceiling Fan on a Vaulted Ceiling?
Vaulted walls lend a level of stylishness to your room; the higher the ceiling, the more it creates the illusion of your larger space. Many homeowners wish to install or hang their fans in vaulted ceilings to help them keep their rooms cool and have a full supply of fresh air.
However, these vaulted ceilings limit any attic access. Homeowners can fit or try to add some ideas, but the hanging installation procedure remains the same as hanging the same on a normal ceiling. The only difference here is to have a longer down rod to help you achieve a clear ceiling angle for the easy cooling process.
Installation tips, it is a bit easier to hang the fan without its blade; this is because blades can be removed and then easily screwed in with a screwdriver. It is also good to have all the blades on the fan assembly point when calculating the total down-rod power cord length in vaulted ceiling walls.
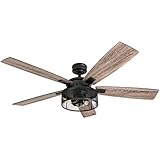
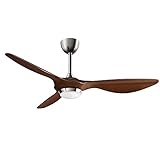
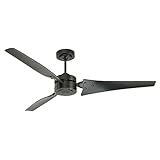
Best ceiling fan for vaulted ceiling recommended:
How to Hang a Ceiling Fan Without a Stud?
Hanging a ceiling fan without a stud makes the whole process simple and easy. All you need is to repeat the above procedure but eliminate the canopy installation, which includes power and lighting. Use all the tools in the first step to ensure you hold the base and blade plat in place. Depending on your own location or ceiling height, ensure you have a strong wall fitting in each process. It is estimated that the outlet fan box supports up to 60 pounds. If the model you own weighs more than 50, then you need a heavy brace for extra support.
How to Hang a Ceiling Fan on a Suspended Ceiling?
Hanging a ceiling fan in the basement or in your outdoor spaces requires an extra installation procedure. Though the process doesn’t differ from the other installation, all you need is to add this to your first process.
Step 1 Choose the Hanging Location
Decide the place to fit in your fan; this should always be in the middle or somewhere ideal for airflow. Eliminate all the old fittings to pave the way for the new ceiling fan adjustments. While working, it is wise to disconnect power as you screw in new lighting and power supply cables along the joist. Mount the gang box by securing a metal cross brace mostly in between the ceiling joist.
Step 2
Connect the base of your suspended ceiling to your gang box and then drop your plumb line to locate the center for crosses and ceiling grinds. This will help you have strong support and tight wall clips for proper working.
Step 3
Use your handsaw to cut a hole in the suspended ceiling, but this hole should be corresponding to guide measurement given in the manual’s script or the measurements you recorded. Then slip all extensions in the fan tube and screw them in place before having power cables in for your motor supply.
Step 4
Using the installation procedure in this guide for both vaulted and normal ceiling, mount all the fans’ fittings to the extension tube and turn the power back to test the ceiling’s operation. For safety reasons, it is wise to use a tester before switching the fan on, try to confirm that each part is supplied with power. You can use a voltmeter or an inspector in this phase.
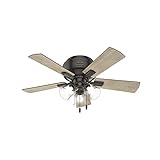
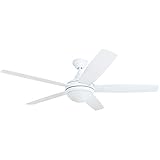
Choose the proper ceiling fan for suspended ceilings:

How Much to Hang a Ceiling Fan?
The whole process can vary depending on your state, but on an average market price, hanging a ceiling fan cost a fee of 75$-200$, but many homeowners spend around 150$ to 400$ for both tools and labor.
Hiring a specialist to help you hang the ceiling for you will cost you an extra 50$ to 80$ per hour, and it takes 2 to 3 hours. Power and other connection might need an electrician, and depending on your state, the price can vary.
Most states have their electrician rates at 90$ per hour, and for a fan hanging and installation, it will cost you two hours. The price range in our guide based its research on New York and New Jersey.
The price can be lower than this or even higher. It is then wise to have a clear understanding of the market price before making any move towards hanging or hiring a Tradie to hang it for you.
How Low Should a Ceiling Fan Hang?
Ancient designers in Athens suggested an optimum fan height installation, but due to different designs available and the ability to control each ceiling fan, the height doesn’t matter anymore. But a good hanging height or mount should be done in the middle of your room at least seven feet from the floor or 18 inches from your wall sides.
This depends on your ceiling heights, for vaulted ceiling 10-14 feet above the ground will provide you with an ideal airflow. The length or power cord depends on the general height of the ceiling.
For proper and ideal air circulations, a ceiling fan hanged on a vaulted wall should at least have 14 feet above the ground. Your fan’s ability also plays a role in the right height to hang your fan, check its specification, and good hanging height for a proper installation process.
For safety and other reasons, ensure your fittings have the right support, and all nails and screws are well driven to avoid injuries and breaking of the fan.
What is the Best Height to Hang a Ceiling Fan?
Each design has some limitations when it comes to the right height to hang your fan. But a common and required height should be at least seven feet above the ground. This is the minimum height you should hang or install your fan for ideal airflow and to avoid injuries. Before making any choices on the height, ensure your findings base their height suggests on + 7 feet high as it is the minimum height.
Can You Change the Spot Where You Hang the Ceiling Fan?
Since ceiling fans are designed to provide a cooling environment, some of them come in a compatible design. Changing them from one place to another can be easy. Yes, you can shift their location, but some factors should come into considerations. Factors like power supply, the height of the ceiling in the new room, and many more should play a role in your shifting process. Ceiling fan allows you to have them in any position, so the fact and the hype online is true you can shift them from one position to the other in your room.
Conclusion
Hanging and installing your ceiling fan requires more than the online guide. It is then wise to involve specialists in easy and better ways. Take your time and try to find a safer and efficient way to install your fan; other factors like the cost of hanging and installations should play a role in your installation process. The guide also used various designs to come up with the installation process.
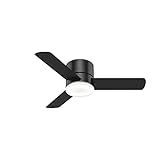
Top Rated Ceiling Fans For Easy Hanging Recommend: